Pages

Monday, May 27, 2013

New Work and Lots Ahead for 2013

 
So it has been another year and a bit. I have not added anything to this blog in such a long time. Money and time have been tight. What else is new? lol.
Whomever may be reading this blog, may well think it's another abandoned project?
Not so at all...
Building an off grid homestead takes time, planning, money, resources and alot of hard work. I was working alot and couldn't get the time to get this all rolling.

About a year ago, I built a garage on my property. So that took alot of time as well. I'll show some pics of that later. I also have a small 10x10 cabin attached to a truck camper, my dad and I built a few years ago. I'll show pictures of these structures later, but for now this blog is strictly for the tiny house project.

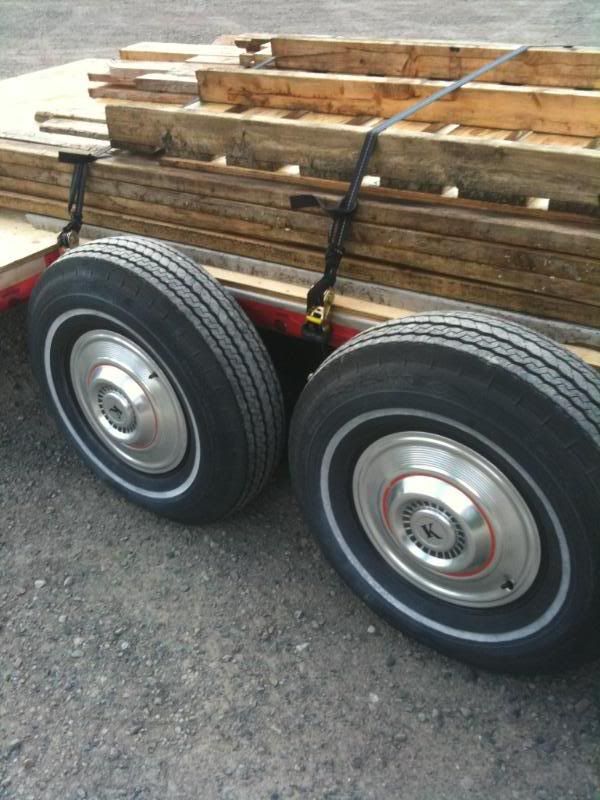
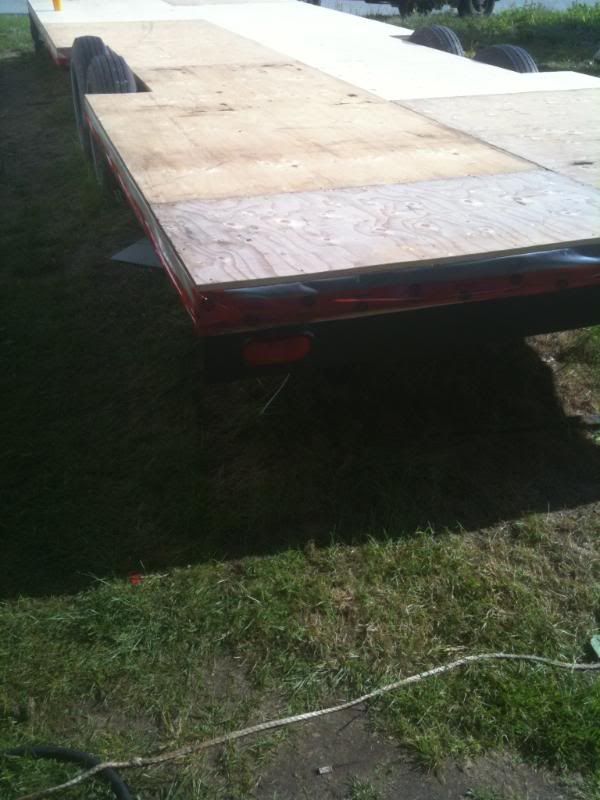
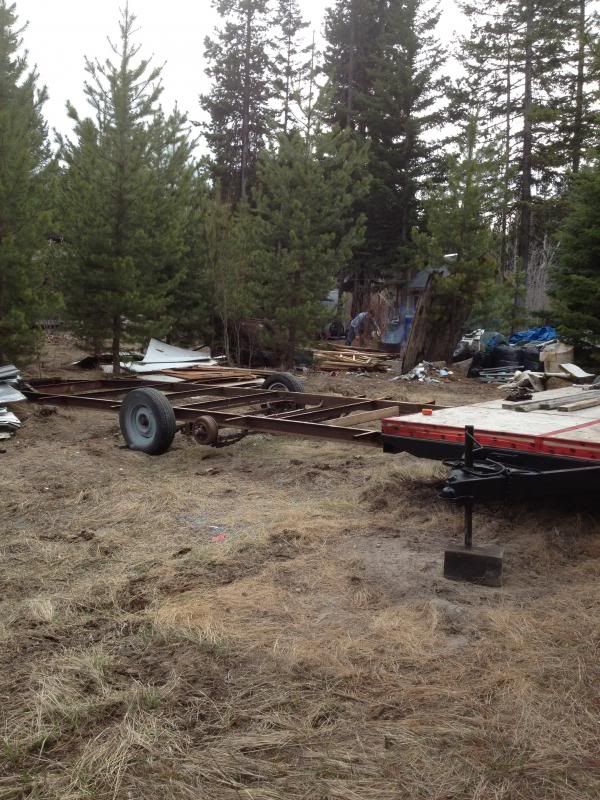
Since my last entry, I have spent a little time gathering things for this project. I managed to get another old travel trailer for free. The trailer came with a very nice near new wood burning stove by Osburn. I paid $350 for the complete stove and chimney. The trailer is a 20 foot terry from about 1972. The inside had been re-inforced with a second layer of walls and insulation and the stove installed. This thing was a total wreck and very very very difficult to dismantle and scrap. I removed the stove and put it away for later. I knocked down the old trailer with great difficulty and have slowly been separating everything and disposing of it and burning it for a while now. Still lots of clean up on that front.
I did not take any pictures of this second travel trailer. But, it was a mess, trust me.

Now that I had stumbled across this second trailer. I was definately going to be building 2 tiny houses in one. I call it a modular tiny house on wheels. I have been thinking of this idea for years now. Finally it may become reality.
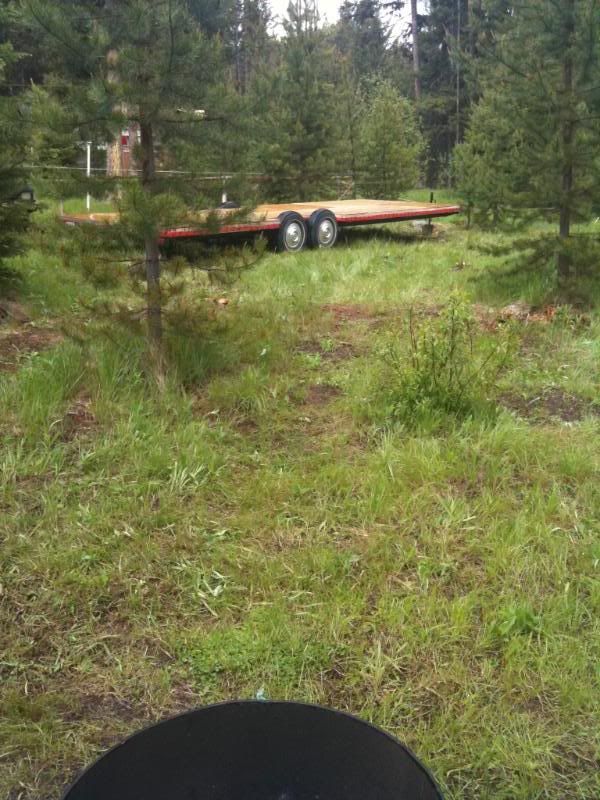
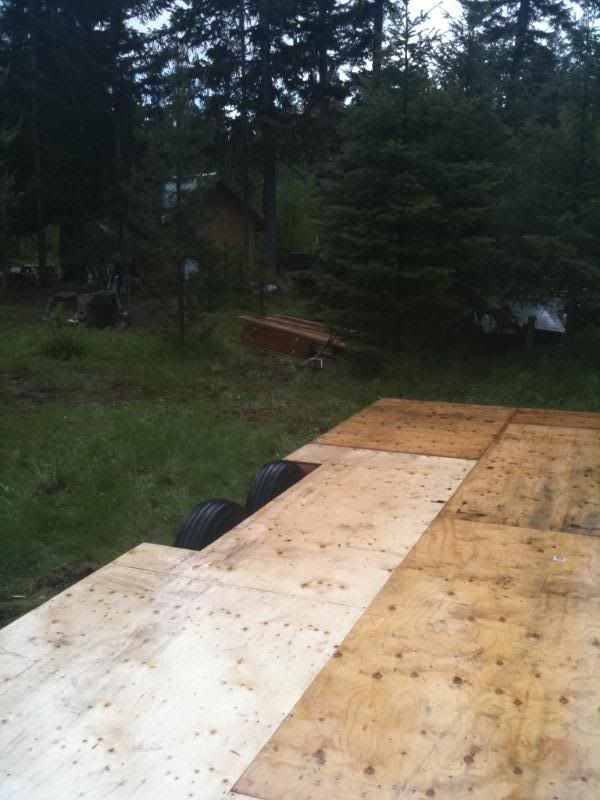
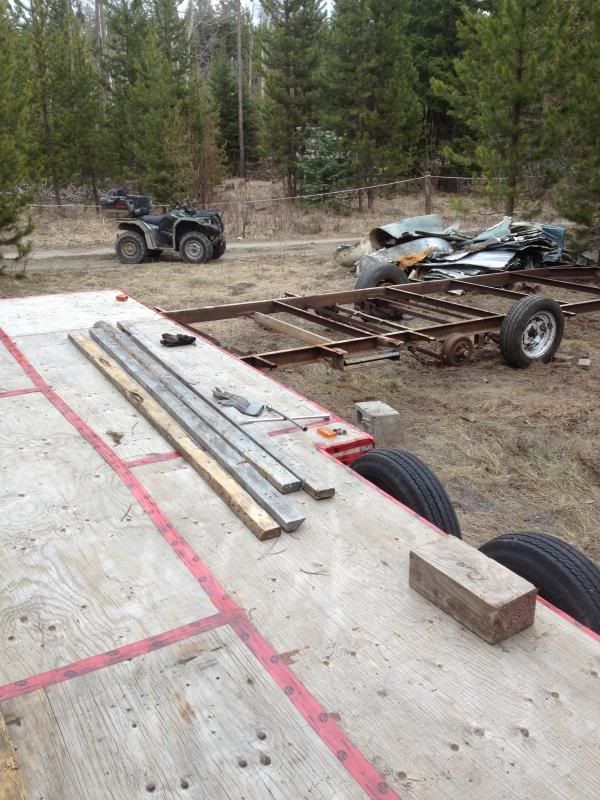
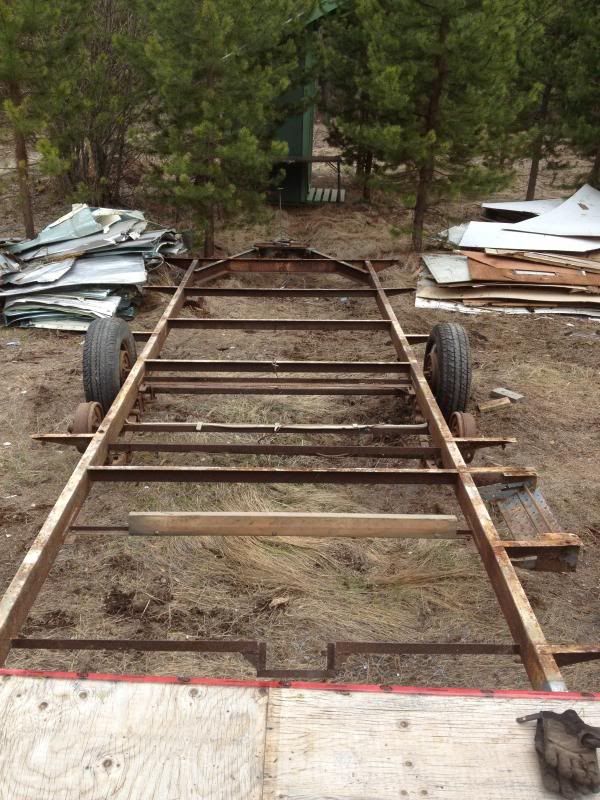
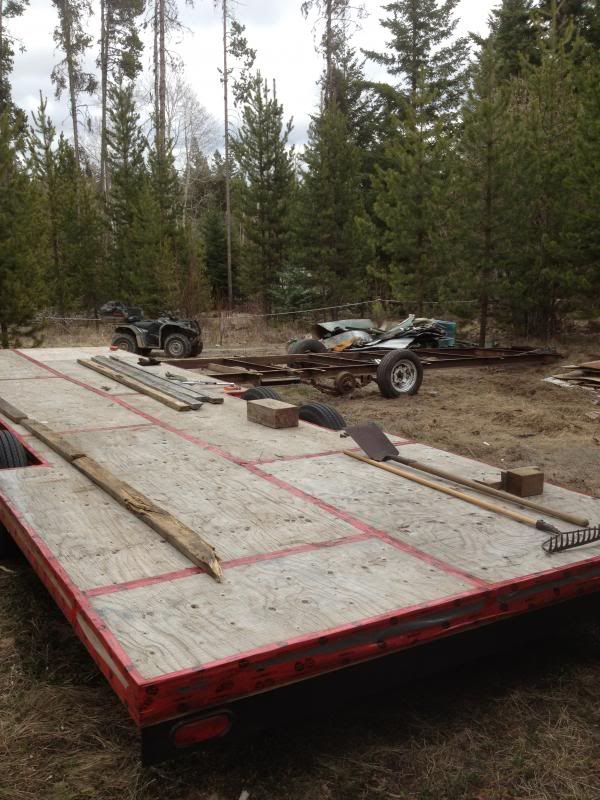
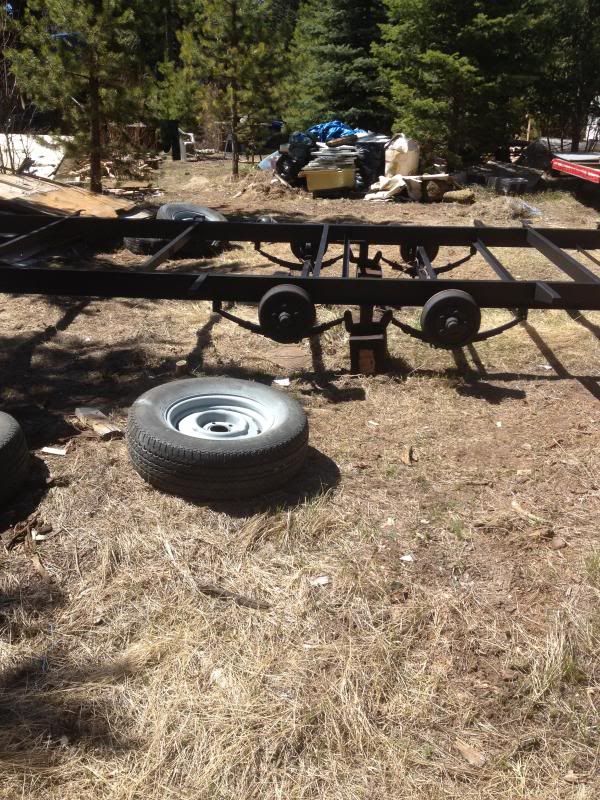
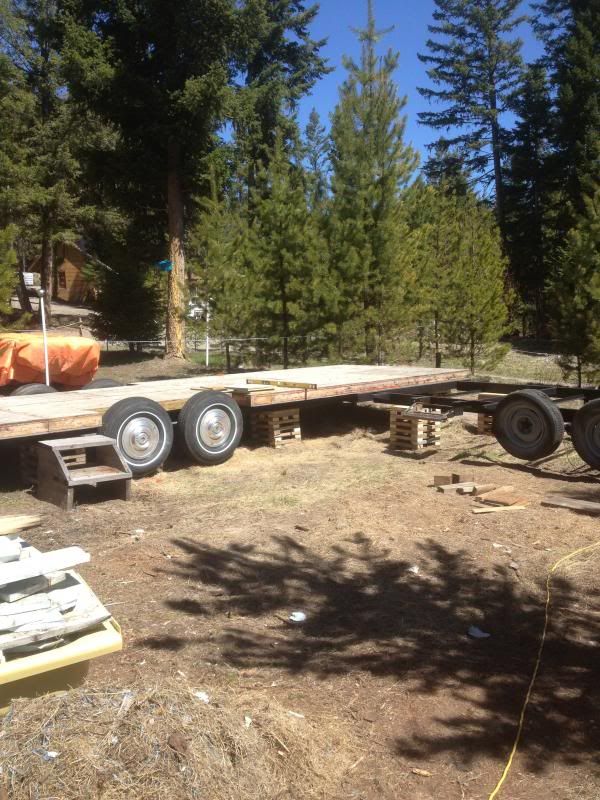
Below is a picture of the second trailer that has been stripped and is being mocked in place. You can see some of the mess this trailer was.
Look at my poor property. It's a mess. Have I bitten off more than I can chew? Yes, but that's what makes life interesting.
I also purchase about $1500 in materials and hauled them up there. 30 sheets of plywood, 200 2x4x8's, 30 2x4x12's, 15 4x4x8's and screws insulation tarpaper ect ect... I am now into this project for just under $3000.00
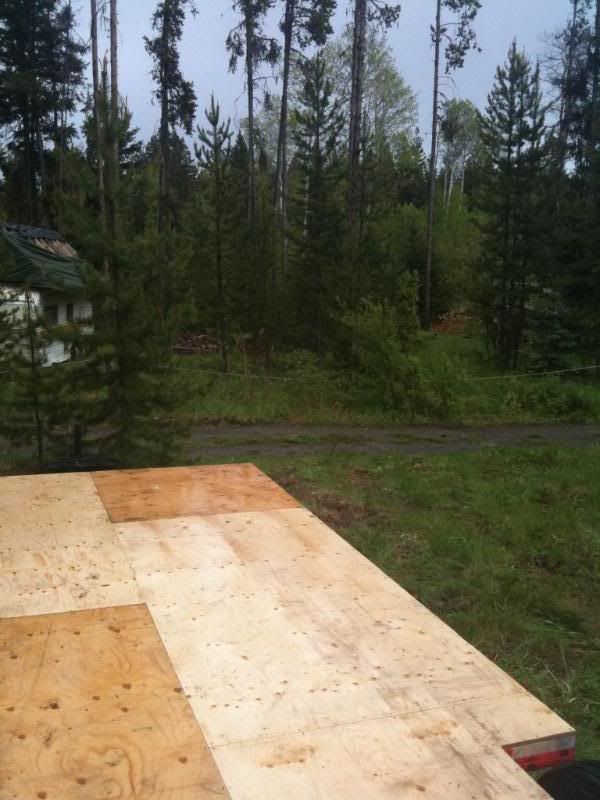
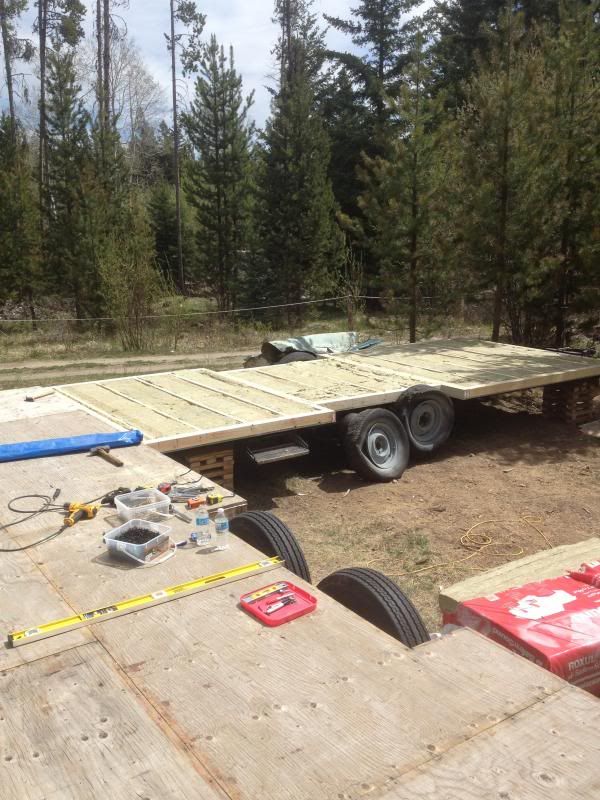
The next picture shows the second trailer quickly sanded and painted. It turned out nice.
Time to start building the floor for trailer #2. Underside plywood painted the same as trailer #1 was done 3 years earlier.lol.
While waiting for the paint to dry, my dad and I got started on the cribbing blocks so we could finnally get the house on location and leveled off. I was going to use concrete blocks, but after some research, this was the best way to go. I chose to leave the ground in its natural state, so it is very uneven and hard to get things level. The cribbing and different thicknesses of plywood worked very well.
Thats my dad, making a cribbing block from 2x4's. It took many many 2x4's and a few hours to get them complete.
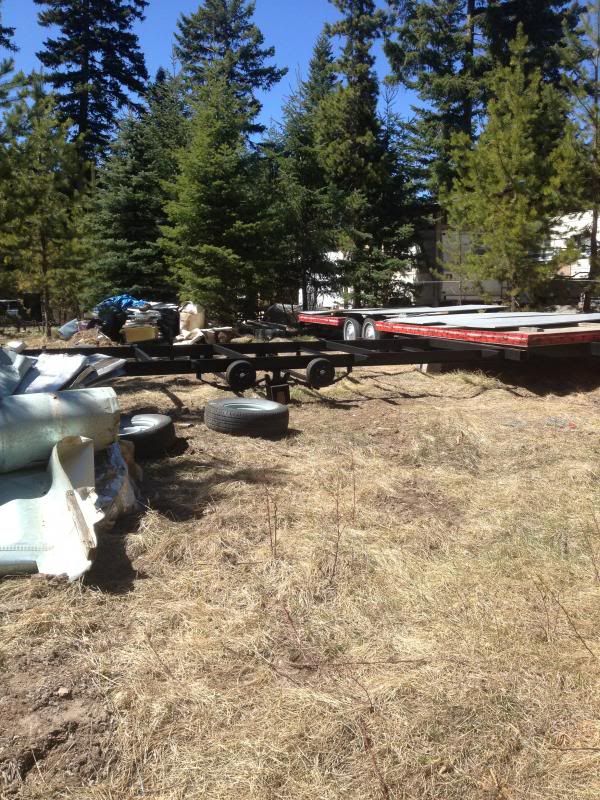
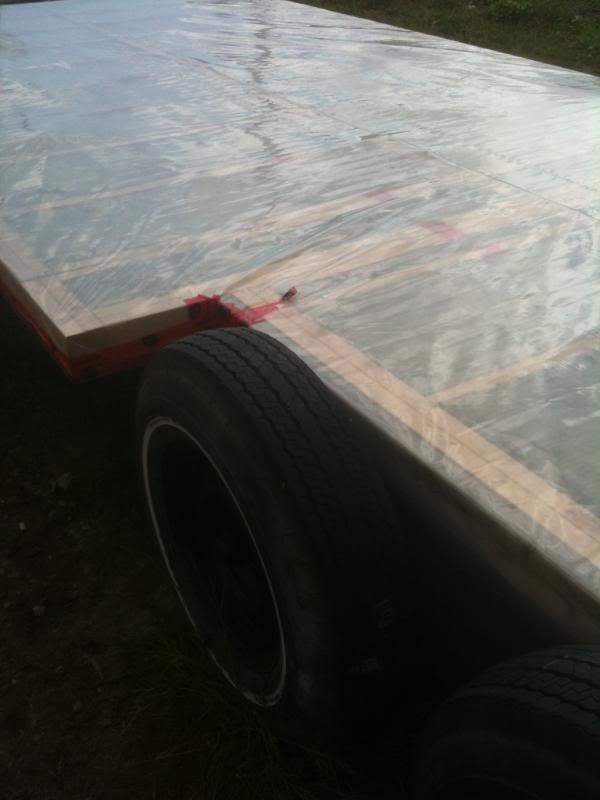
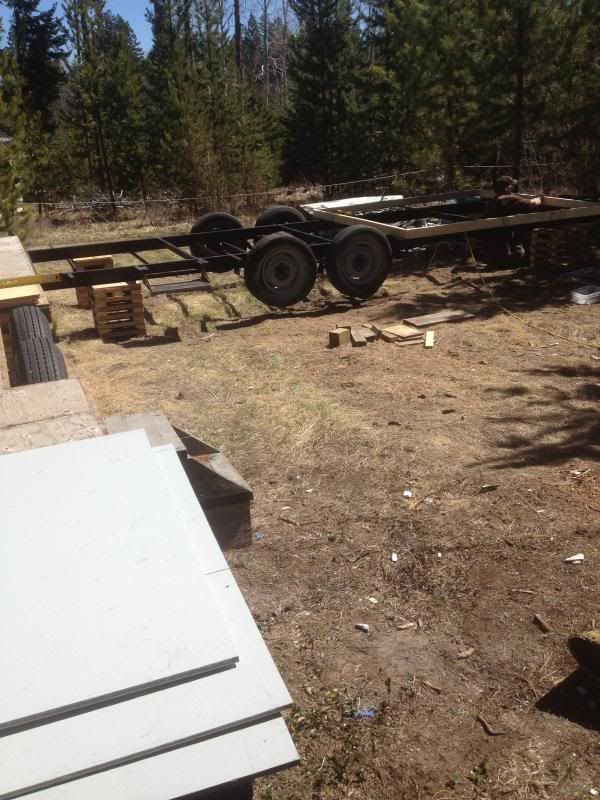
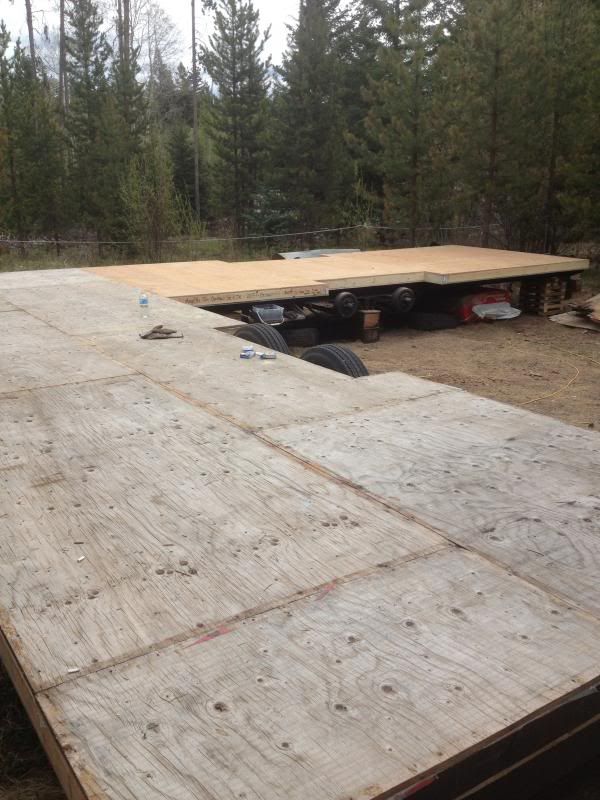
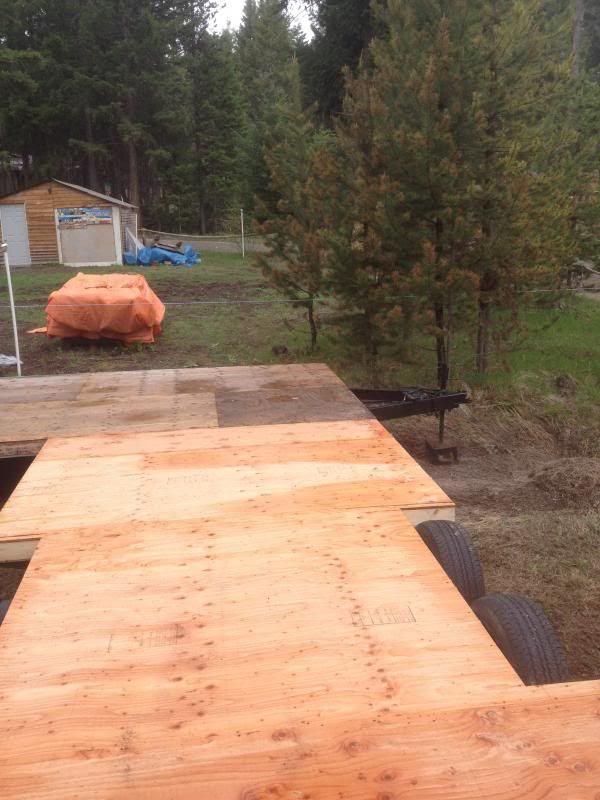
Here are some pics of the trailers being leveled.
May 11,2013. The weather was so nice and hot, we managed to get quite a bit done on this weekend.
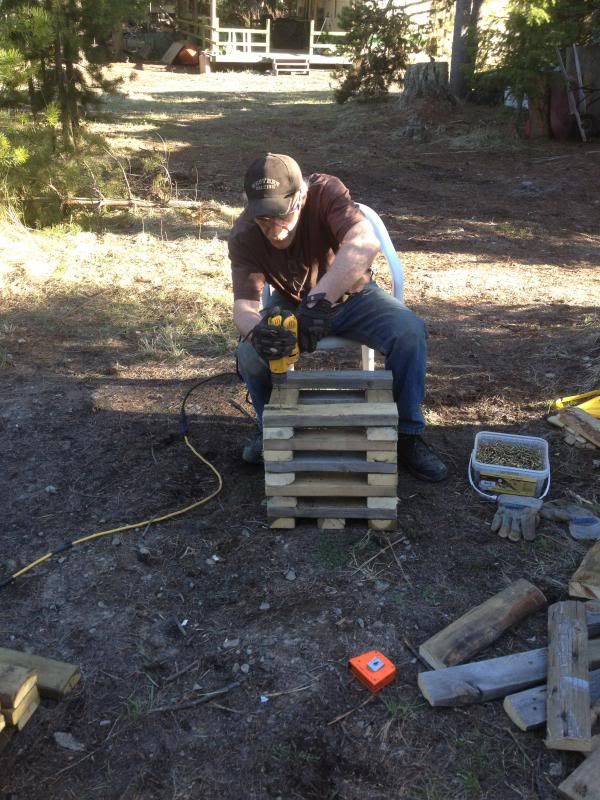
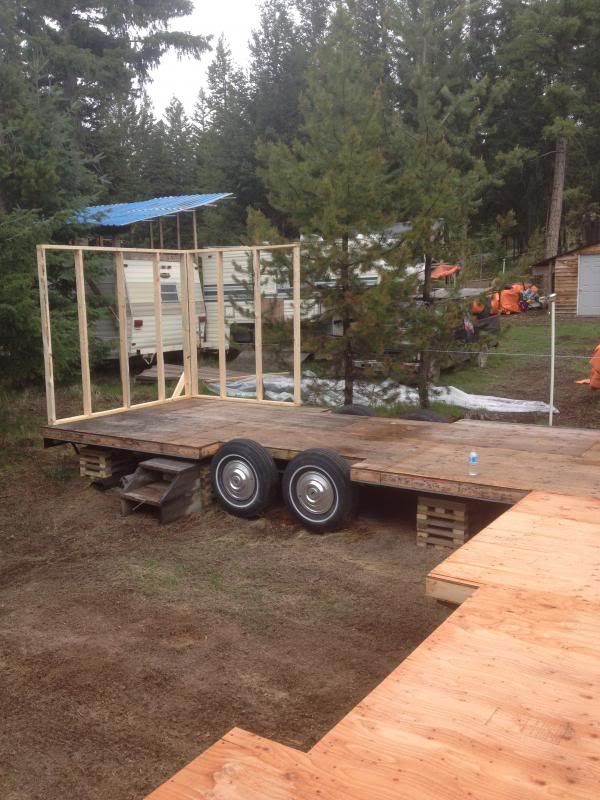
Heres my dad starting on the first floor section of trailer #2.
All the same treatment as trailer #1. 3 sections bolted to the trailer frame when completed.
After bolting them down, it was time for the ROXUL insulation.
And vapor barrier and plywood.
It was great having my dad help me out. He kept pushing me, let's go, let's go, he kept saying.
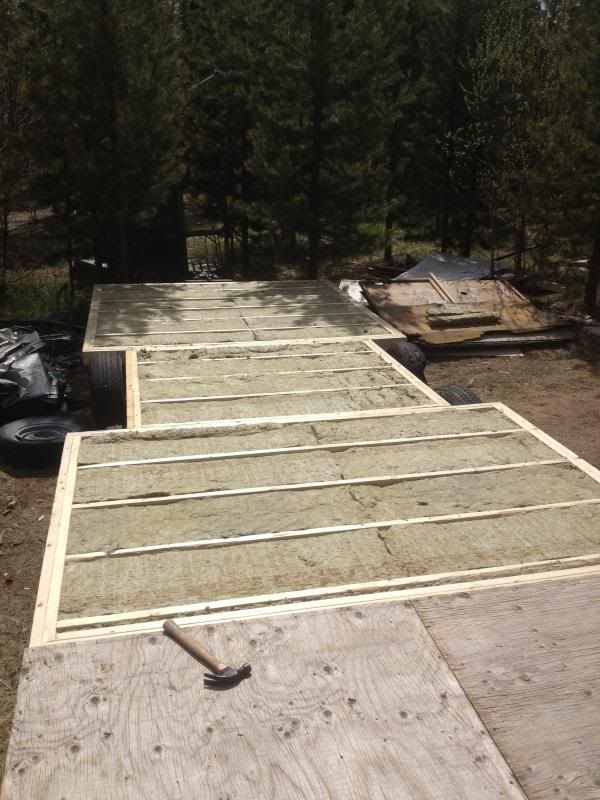
We got more done in 3 full days than I had been able to do by myself in 3 years. "GOD I'M LAZY" lol.
We even had time to get a couple of wall started...
I did some clean up and that's how we left it for that weekend.

I am confident this project will be moving much faster now. Stay tuned, there will be lots of pics.


Thursday, July 28, 2011

The Move

On July 1,2011 I loaded up some salvaged lumber to take with me to the property where I will finish building the tiny house. I also restored the hub caps from the travel trailer. Here are some pictures.

Pee break at the half way point, and a check on everything. We're off.

After arriving we unloaded the lumber(other projects). I hooked it up to the quad to get it on location so I didn't have to cut the trees down that are directly in front of the hitch. That's my fire pit at the bottom of the above picture.


That's the outhouse that my father and I built the year before. And the quest cabin below that we stay in while getting everthing built. It's a truck camper with a snow roof and a 10'x10' cabin built off the back. It's a small cabin to avoid building permits. It has a wood stove and everything you need. We added some windows in the cabin, not shown(older pictures).

That's it for now as we are building a small work shed and a few other projects before starting on the framing of the tiny house. I may or may not get some walls up this year because the weather has been so bad this year and has held us up quite a bit. Look, July 1st, and pissing rain...Oh, the trailer/foundation was completed for well under $1000...Stay tuned!

I'm Back!

So, it's been 8 months since I've updated the blog, and in that time not a whole lot got done. Life sometimes gets in the way. The weather has been terrible, cold and very wet. But now that it's spring, I'll be working hard to get it all framed in for winter. So in the past 8 months I have done a few things. I did bolt the floor to the trailer using subfloor adhesive and 32, 3/8" bolts through steel to hold it all down (no cost for these items). I also drilled holes for the taillights that I bought and wired them up. The wire, loom and taillights came in at $42. Drilling through the steel was very difficult. Today I went and bought some more supplies. I bought some tuct tape, 6mil vapour barrier and 3 sheets of 5/8" ply. I also got 3 bags of  Roxul R16 Safe and Sound insulation and floor screws. These items came in at $140. I did salvage 4 sheets of 5/8" ply for the floor. So I quess I saved about $100. I removed the tarp and got started. It took me 3 hours to complete.

                        You can see where it is bolted in a couple of places. And the insulation.

 
Ready to move it to its location...

Friday, October 8, 2010

Ready to Bolt it Down

Well, I have finally completed the framing for the floor. I am now ready to center and square it up, and bolt it all down. Doing most of the work myself, I'm starting to realize this is going to be time consuming without much help. It will get done however. Money and time are tight, but thats why I'm building it. To allow for more time for myself and to try to save money after I move into it.
Here are pictures of the framing that I completed yesterday.


I am prepared to fasten the floor to the trailer and have all the bolts and hardware. I even got some PL 400 Subfloor and Deck adhesive to put between the trailer and wood to prevent squeaking and, for a bit of hold. It will also kind of seal up my plywood seams that rest on the crossmembers, hopfully keeping air and water out. Due to a major storm with high winds coming, I am unable to bolt it down until it passes. I am also in between paydays so I can't even purchase my insulation, tuck tape, vapor barrier and plywood. I'll just keep plugging along, piece by piece, doing what I can. Just like a large puzzle one piece at a time..

Wednesday, September 29, 2010

1 Step Forward 2 Steps Back!

With the floor framed and laid out on the trailer frame, I noticed that the outside crossmembers on the trailer  were not allowing the floor to sit completely flat. Between work and poor weather, plus going to the property on the weekend, and the outer crossmembers sitting high, I haven't progressed to where I'd like to be. So with bad weather coming I decided to stand the floor sections up on end and tarp them. This allowed me to put relief cuts on all the outriggers so that they can sit level. After the floor is bolted down, the outriggers will be welded at that time(level).
I also cut out a bunch of crossmembers at the rear of the trailer. They used to hold the grey and black water tanks. I relocated them so that they are at 16"OC and added a couple more so that the floor will be better supported at the rear. I had my dad weld them in. Then it started to rain, so I didn't get to paint them.

This is where I ended up. This weekend I will glue screw and bolt the floor to the frame. Insulate and vapor barrier. Then put on my 5/8" top sheets to complete the floor. Then hopefully I can start on the walls before the snow comes.

Monday, September 20, 2010

Floor Construction

I worked on the floor for a few hours on Sunday. A couple more hours today. Thunderstorms held me up a little, but it's going fairly smoothly. On day one of floor construction, I assembled my first section (12'x8'). But because my outer edges are doubled up, and the fact that my phone kept ringing, I managed to get the 16" OC screwed up. I didn't find out until the plywood went on and didn't line up. I had to unscrew everything and redo it. Minor setback I call LEARNING. It was raining this morning, but I decided to go and work on it anyway. Just as I started to work the sun came out. Perfect. So I managed to get the framing complete in a couple hours today.
The floor is built in 3 sections 12'x8',8'x8',6'x8'. It will all be screwed, glued and bolted together and to the trailer frame.
The floor will have 1/2" ply underside painted with Grey gloss marine enamel #15 tarpaper, framing and insulation, vapor barrier and 5/8 ply for the topsheet. I am happy with how it's turning out so far, to plan.

I have also been messing with Google Sketchup and have numerous designs and layouts. Here is one I slapped together in a couple hours to see if it would theoretically work.
As you can see, I plan on building another trailer hopefully to use as an add on in the future. But for now I'll just concentrate on the one trailer. This is a rough sketch and could change slightly from the finished product.
The plans will be for an apartment sized or rv range. A large rv fridge and double sink. Composting toilet. Possibly hot water on demand?? RV water tanks, rv furnace, woodstove, solar lighting a full bathroom with rv washer dryer and hopefully a 4' plus tall loft that will be 13' in length. It's actually a little large, but what the hey? Right? A mcmansion on wheels...

Friday, September 17, 2010

How It All Came About

I have a small piece of treed recreational property in the mountains. It has no power or water. I have wanted to build a small cabin, but permits are a problem(long story). After a lot of research and looking at different ways to live, I decided that a cabin/house on a trailer would be ideal for my needs and my situation. I get to build my cabin and slip under the radar.
I do not have any construction experience or many tools for construction. But I have done my research.
The first order of business was to find a trailer. Searching Craigslist, I found out deck trailers are expensive. I had read about people RECYCLING old rotten travel trailer frames, to build their house on. Great idea, and so my search began. First one I found advertised was for $350 so I went and had a look. The frame was good(but 26' long). I was planning on a 20-22' max, but plans change.The trailer was completely rotten. I offered the guy $300 and off I went. It's a 1979 Komfort 26'er.
Once I got it home I began the process of demolition. Here it is, Aug 7,2010
Demolition was a lot of work with a sledge hammer and sawzall. It took me several days by myself. Not for the faint hearted.
All that was salvaged was the range and hood, and a like new hot water heater. The trailer also came with 15 Gallons of unused various paints, stains and primers that will be used later. I separated everything and disposed of it properly Insulation, aluminum, wood. I spent $88 to dump everything. I also had to buy a new sawzall, as I didn't have one, and the sledge hammer was slow going and messy. Bosch Sawzall $98.

That was a lot of work. But, it saved me atleast $1000 and a trailer was recycled. Now time to remove the old tanks and grind off the rust.


My father is a fabricator. He had some steel to donate to the project. We decided to to add some heavy crossmembers to beef up the somewhat flimsy rv frame. He hooked up the little arc welder and away he went. I also removed the wheels and checked the brakes and bearings. Everything was like new even the tires. It seems that this trailer was bought and parked its whole life, because everything is factory original 1979 even the tires.
Here it is all welded painted and tuned up.

Just need to re wire it and my foundation will be complete. $40 on paint and bearing grease was free.

I bought some materials to start building the floor. It will all be framed 2x4 16" OC. I bought 7 sheets 1/2" ply $120, for a base for the floor framing. Remember the free paints, well, I used a can of wood primer for the 7 base sheets. I then used a battleship grey gloss marine enamel(2 coats) on the 7 base sheets. Nothing will penetrate this for atleast 20yrs. Brushes, tray and rollers free with trailer. I bought 50,2x4x8's and 4 2x4x12's =$112, #15 tarpaper and some screws $40.
Here is the primered plywood. I hope to start framing the floor this weekend. Until then I have no more pics.